| 7.2. New Layer | ||
|---|---|---|

|
7. The “Layer” Menu |  |
| 7.2. New Layer | ||
|---|---|---|
|
|
7. The “Layer” Menu | |
The command opens the “Create a New Layer” dialog that allows you to add a new, empty layer to the layer stack of the image, just above the active layer.
You can access this command from the image menubar through → , or by clicking on the dedicated button in the layer dialog.
Under the title “Create a new layer” you can see the name of the image for that you create this new layer and next to the title a thumbnail of it. That is interesting to see if you have selected the good image when there is more than one image open.
The name of the new layer. It does not have any functional significance; it is simply a convenient way for you to remember the purpose of the layer. The default name is “New Layer”. If a layer with the name you choose already exists, a number is automatically appended to it to make it unique (e.g., “New Layer#1”) when you click on the button.
If you click on one of these color buttons, the "Eye" icon box of the created layer will have this color. This is interesting when you have many layers in the image.
Default is “Normal”. The drop-down list offers all layer blend modes. On the right, another drop-down list to select between “Default” or “Legacy” group of modes.
Layer blend modes are described in Layer Modes.
The space used by the layer mode. This option is not activated.
The layer's mode (sometimes referred to as its “blend mode”: Normal, Multiply, etc.) determines how the color values of the layer and its backdrop are combined, while the layer's composite mode determines how the alpha values of the layer and its backdrop are combined. (The layer's backdrop is the content against which the layer is composited; namely, it's the combination of the layers below it.)
There are two regions of interest when compositing the layer against its backdrop: the opaque region of the backdrop, and the opaque region of the layer. The layer's blend mode determines how to combine the colors of the intersection of these two regions: i.e., the common opaque region of both the backdrop and the layer (pixels belonging to only one of these regions don't need to be combined with anything, and retain their original color.). The layer's composite mode determines which part of these regions to keep, and which to discard.
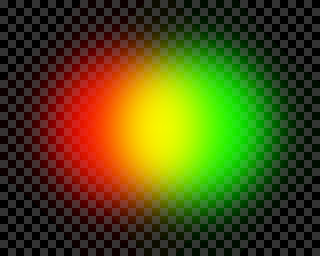
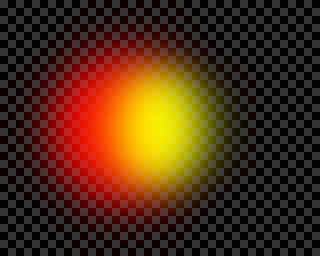
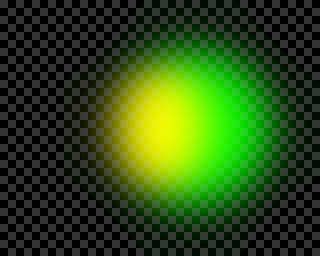
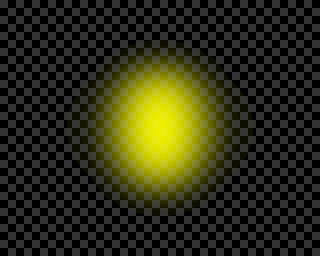
The example images below show the composition of two layers -- the bottom layer containing a red feathered circle, and the top layer containing a green feathered circle -- using “Addition” mode, and different composite modes (applied to the top layer).
Union: keeps the opaque regions of both the layer and its backdrop, i.e their union.
Clip to backdrop: keeps only the opaque regions of the backdrop (this includes the common opaque region to both the backdrop and the layer i.e their intersection).
Clip to layer: keeps only the opaque region of the layer (this includes the common opaque region to both the backdrop and the layer, i.e their intersection).
Intersection: keeps only the opaque region to both the backdrop and the layer, i.e their intersection.
Auto: “Auto” mode is not a separate composite mode, but rather corresponds to one of the other composite modes, depending on the layer's blend mode: for “Normal”, “Dissolve”, and “Merge”, it corresponds to “Union”, and for the other modes (that support different composite modes) it corresponds to “Clip to Backdrop”.
Default is “Auto”. In the drop-down list, you can choose between “RGB linear” and “RGB perceptual”.
Channel encodings are described in Glossary.
Sets the opacity of painting on the layer. Default is 100%.
The dimensions of the new layer. When the dialog appears, the values are initialized to the dimensions of the image. You can change them by using the two text boxes. You can also change the units in the pull-down menu to the right.
The origin of the new layer is the upper left corner of the image. Here, you can set precisely the position of layers smaller than the canvas, especially text layers.
There are five options for the solid color that fills the layer: the current Foreground color, the current Background color, White, Transparency, and Pattern.
These switches reproduce options described in the Layer Dialog.