| 5.2. Apply Lens | ||
|---|---|---|

|
5. Distort Filters |  |
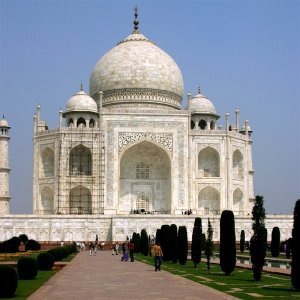
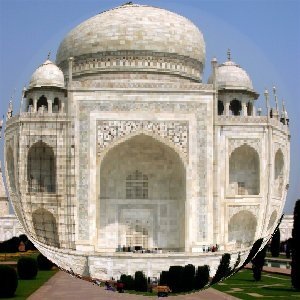
Figure 17.48. The same image, before and after applying lens effect.

Original image

Filter “Apply lens” applied
After applying this filter, a part of the active layer is rendered as through a spherical lens.
![[Note]](images/note.png)
|
Note |
|---|---|
|
These options are described in Section 2, “Common Features”. |
Lens will be more or less convergent (1-100).
The lens seems to be put on the active layer.
The part of the active layer outside the lens will have the background color selected in the toolbox.
You can select the color:
Click on color dwell to open the color selector dialog.
Click on the eye-drop button on the right to pick color from the image.
The result of this filter can be larger than the original image. With the default Adjust option, the layer will be automatically resized as necessary when the filter is applied. With the Clip option the result will be clipped to the layer boundary.